Hello all! Today we have a short tutorial for my new pattern, Rosslyn. This tutorial is for the 2/3LC and 2/3RC, or the “two over three left cross cable” and “two over three right cross cable”.
For this pattern, this cable is worked over a 2×1 rib pattern, or k2, p1. In these cables, you will cross one set of 2 knit stitches over the next set over. Scroll on to see what I mean:
2/3LC
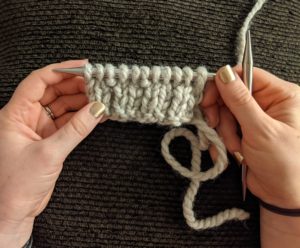
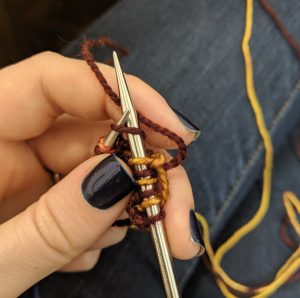
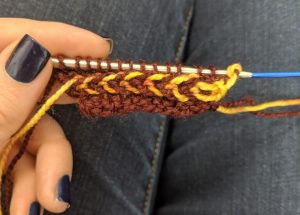
Starting with the 2/3 LC. This swatch is a 2×1 rib of k2, p1.
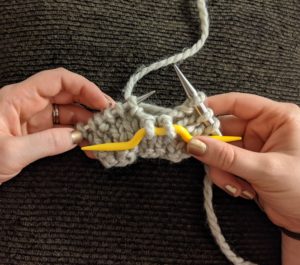
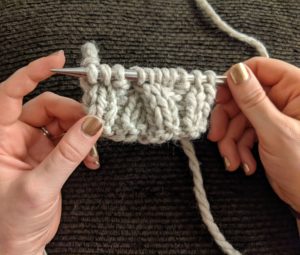
Here I’ve worked one repeat of the pattern and I am ready to work my cable. Slip the next 2 stitches onto the cable needle and hold to the front of the work.
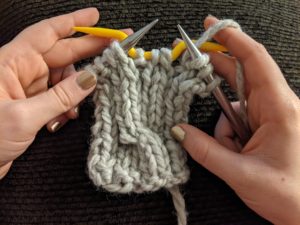
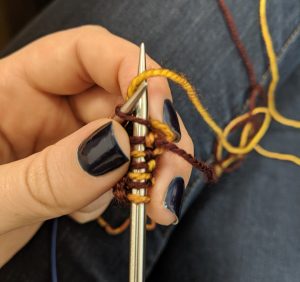
k2, p1 the next 3 stitches on the left hand needle.
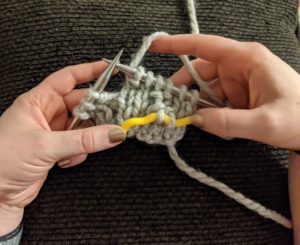
To complete the cable, k2 the stitches on the cable needle.
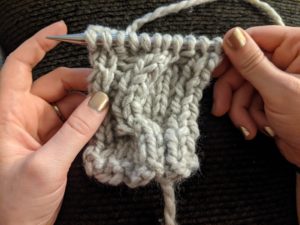
Here is the completed 2/3LC.
2/3RC
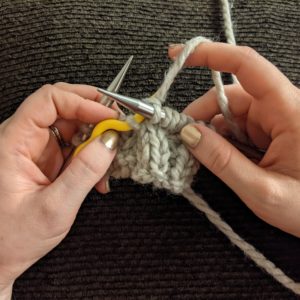
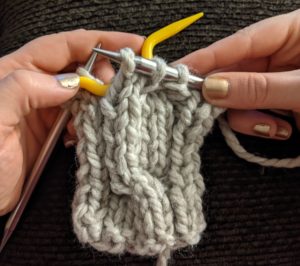
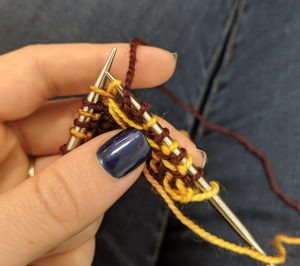
The 2/3RC works the same, but in reverse. In this case we will slip the next 3 stitches to a cable needle and hold to the back of the work.
k2 the next 2 stitches on the left hand needle.
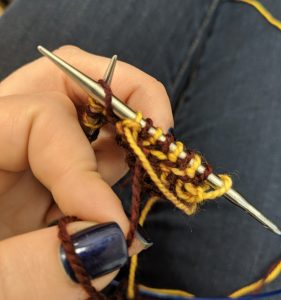
p1, k2 the 3 stitches from the cable needle.
Here is the completed 2/3RC.
Although both cables are demonstrated in the same swatch in this tutorial, in the Rosslyn pattern, you will always cross a given raglan the same way – in other words, two of the raglans will always use the 2/3LC, and the other two will always use the 2/3RC.
Another tutorial for you, this time teaching you how to knit a box pleat. The box pleat is an elegant but simple technique to seamlessly fold your knitting and combine stitches.
This technique is used in my Casagrande sweater pattern. The tutorial below is specific to that pattern, although, of course, this technique could be used to include a box pleat in any project:
If you do not find the tutorial above helpful, or want additional guidance, Purl Soho has a box pleat tutorial as well. Their tutorial is for a 7 stitch box pleat, while the Casagrande uses an 8 stitch box pleat, but the technique is still the same.
UPDATE: I’ve recorded a new video for my Latvian Braid knit flat, which demonstrates both left and right pointing braids. Check it out below:
Here I was, agonizing for months about what my first blog post would be. Now here we are, the first post by necessity: a Latvian Braid tutorial.
This came about because I wanted to put together tutorials for my South Woods pullover pattern, which has a Latvian Braid worked flat (a flat Lat, if you will). There are plenty of tutorials online for braids worked in the round, but all the tutorials I found for working flat were at the very least confusing, and in some cases completely wrong!
Normally I leave the tutorials for people with better equipment, video skills, and camera voice, but out of necessity here I am!
Here is a link to a youtube video with the tutorial:
If you’d prefer a photo tutorial, read on! For reference, MC is main color (red) and CC is contrasting color (gold).
Photo Tutorial
Row 1 – set up row (RS): On this row you will k1 CC, k1 MC the whole way across the row, nothing special
Row 2 (WS): Now that you have turned the work, you will be starting with a MC stitch on this row. KNIT that stitch in the MC. Knit the next stitch in the CC. Now you’ll have another MC stitch. Bring the MC working yarn UNDERNEATH the CC. Knit that stitch.
See how that MC is coming up from underneath the CC yarn?
Now the next stitch you’ll do the same thing, except with the CC. Bring the CC yarn UNDERNEATH the MC and knit the stitch.
You’ll repeat this the whole way across the row.
Row 3 (RS): Now you’re ready to work a RS row, starting with a CC stitch. Purl the first stitch with the CC yarn. Purl the next stitch with MC yarn.
Now on the next CC stitch, you will again bring the CC working yarn UNDER the MC working yarn and purl the stitch.
In the above photo I have just finished wrapping the stitch and I am about to slide it off. See how the CC goes under the MC yarn?
And then the same thing with the MC for the next stitch. Bring it under the CC working yarn.
In that photo I’m just about to bring my MC yarn to wrap the stitch, bringing it UNDER the CC yarn.
Again, you’ll repeat this the whole way across the row.
And just like that, you’re done! That’s it! Cut your CC yarn, you don’t need it anymore.
Extra Info
Some helpful info about the Latvian Braid.
First, the above directions give you a left-pointing braid. If you want a right pointing braid, you’d cross the working yarn OVER each time, rather than under.
If you have worked a Latvian Braid in the round or have looked at tutorials, you will see that on one round you cross the working yarn UNDER, and then in the next row you cross them OVER. This obviously differs from the flat braid, where you are crossing them in one direction (in this case, under) for every row.
If you watch the end of the video, you will see what happens if you work under one row and over the next – you end up with diagonal lines instead of a V. The same thing would happen if you were to do a Latvian Braid in the round and wrapped them under every time.
So here’s the rule. When working flat, wrap them the same way every row. When working in the round, wrap them one way one round, and the other way the next round.